Showing posts with label chicken. Show all posts

Monday, April 2, 2012

Oven Fried Chicken

I absolutely love fried chicken.  Now I’m not talking any fast food place fried chicken.  I mean good ole fashioned homemade, buttermilk marinated and breaded fried chicken. 
But sadly due to time and the fact that fried chicken instantly seems to attach itself to my already ample booty I try to stay away from it.  Luckily for us I have found a pretty decent oven fried chicken recipe that is quick and easy. 
Everyone loves “fried” chicken nights here now and these are as simple to make as store bought shake and bake chicken.
DSC_0328
Oven Fried Chicken
Ingredients
  • Enough chicken legs to feed your family
  • 1/2 cup all-purpose flour
  • 1 teaspoon garlic powder
  • 1/4 teaspoon onion powder
  • 1 teaspoon salt
  • 1 teaspoon paprika
  • 1/4 teaspoon sage
  • 1/4 teaspoon ground black pepper
  • 1/8 teaspoon or less cayenne pepper
  • 1/2 cup butter
Directions
  1. Preheat oven to 450 degrees F (230 degrees C).
  2. Mix flour, garlic powder, onion powder, salt, paprika, sage, cayenne and pepper together in a bag. Add chicken parts in a bag and shake until well coated.
  3. Melt butter/margarine in a 9x13 inch baking dish in the preheated oven. Place chicken in the baking dish skin side down and bake for 20 minutes. Turn pieces and bake another 20 minutes until tender and juices run clear.
signature

Tuesday, October 4, 2011

Sweet and Sticky Oven Baked Chicken Thighs

I was searching the internet the other day looking for something new to try with chicken thighs.  Seems that more and more of my weeknight meals revolve around them and the family is getting a little tired of my normal baked thigh recipes.  Luckily this recipe caught my eye and it is definitely a keeper!!! 
Kristen from Dine and Dish makes these using chicken wings but thighs are what I had.
DSC_0390
Sweet and Sticky Oven Baked Chicken Thighs (from Dine and Dish)
Ingredients:
1 cup honey
1/4 cup molasses
1/3 cup ketchup
1/8 teaspoon cinnamon
1/2 teaspoon Spanish paprika
1 Tablespoon seasoned salt
1/8 teaspoon fresh cracked black pepper 
1/4 teaspoon Kosher salt 
1/4 teaspoon minced garlic
2 Tablespoons Worcestershire sauce
1 Tablespoon mustard
1 ½ cups brown sugar
8 chicken thighs
Preheat oven to 375 degrees F

Directions:
  1. In a medium bowl, whisk together all ingredients except the chicken thighs
  2. Line metal baking sheet with aluminum foil and place a rack to elevate the chicken.
  3. Pour the barbecue sauce over chicken thighs in a large re-sealable plastic bag. Seal tightly and shake until sauce is well distributed.
  4. Arrange chicken thighs on the rack over the aluminum foil lined baking sheet.
  5. Bake in preheated oven for 1 hour or until crisp and cooked through.
signature

Friday, May 27, 2011

Mexican Chicken Bake

I am totally stuck in a rut for dinner ideas.  Or at least I was until I remembered this recipe I had bookmarked a week or so ago.  So glad I remembered!  This was probably one of the best meals I have made in a long time.
I took the original recipe from here…Dandy Dishes
Of course I had to change some stuff around and make it all mine right?

DSC_0336
Mexican Chicken Bake Serves 4
Ingredients:
3 chicken breasts (follow the simple recipe below for Salsa Chicken)
1 can pinto beans (drained and rinsed)
1 ½ tablespoons cumin
1 ½ tablespoons chili powder, or more if you really like it spicy
1 tablespoon garlic powder
1 tablespoon cilantro, chopped
Juice of 1 lime
¼ cup sour cream
salt & pepper to taste
½ cup shredded cheddar cheese

Optional garnishes:
Shredded lettuce
Diced cherry tomatoes
Sliced avocado
Cilantro leaves
Sour cream

Diections:
Preheat your oven to 375º. In a large bowl place the shredded chicken, pinto beans, spices, lime juice, sour cream, cilantro and salt and pepper to taste then mix well. Transfer to a lightly oiled baking dish and top with cheese. Pop into the preheated oven for 15 minutes then garnish the top with shredded lettuce, diced tomatoes, avocado slices and serve with a nice dollop of sour cream and your favorite hot sauce.

Salsa Chicken
Ingredients:
I jar of good quality salsa (or just you favorite!)
chicken (4 breast or 8 thighs-boneless skinless)
Directions:
Throw chicken and salsa into a crockpot on low and cook for 4-8 hrs depending on whether or not you had the foresight to thaw your chicken (yes, I throw frozen chicken in here).
Once the chicken is done.  You need to remove it from the crockpot and the sauce and shred it.  This chicken can now be used in tacos, nachos, or anything else that requires some nicely seasoned chicken!

***We ended up using this dish in tacos, as nachos and just like the picture is!  They loved them!!!
***You could also use a rotisserie chicken and shred that in place of the salsa chicken!
signature

Thursday, February 3, 2011

So it’s been a while

I know, I know…I’ve been a very, very bad blogger but honestly I was totally immersed in a 3 month long project that I loved dearly and took up the majority of the very limited free time that I have.  But the project has been completed and the torch has been passed so “I’M BAAAAAAAAACKKKKK!”
I’ve missed my twitter friends, my Facebook friends and most importantly I’ve missed my blog.  So I am back nice and fresh with a recipe that is perfect for this up coming weekend (there is some sort of game or something going on right?) or really any time you get a craving for some chicken wings that will knock your socks off!!!
DSC_0140
They are fast and easy but take a little bit of pre planning for the marinating time but other than that they are perfect for a busy weeknight meal…Thanks @aggieskitchen for a great recipe!
Ranch Chicken Wings (from Aggie’s Kitchen, with slight seasoning changes)
Ingredients:
2 lbs chicken wings
1 cup olive oil
1 1/2 tsp dry lemon pepper seasoning salt
2 cloves of minced garlic
1/2 tsp dry dill seasoning (Or look for a seasoning called “It’s A Dilly” which has it all)
Dry Ranch Dressing Packet
Fresh Ground Pepper
Combine oil, lemon pepper seasoning, garlic and dill seasoning in bowl. Pour over chicken wings and let marinate for 4-6 hours.
Place wings in an oven pan covered w/foil and sprinkle liberally with Dry Ranch Dressing packet and fresh ground pepper….cook 425 degree for about 35-40 minutes. You may want to broil them for a few minutes to brown them right up…But watch them closely! Serve with Ranch dressing and cut celery.
signature

Thursday, October 7, 2010

Pasta with Escarole, White Beans and Chicken Sausage…

It’s finally feeling like fall here.  Our day time temps are only reaching into the mid 80’s right now and the night time temps are down in the low 60’s.  Life in Florida doesn’t get much better than this.  With the windows all open and the A/C off, life is so good.  Makes me want to cook again.  Nice pots of soup and stew, filling casserole dishes and comforting pastas.
This is a pasta dish that I have been wanting to try out.  Simple enough but just finding the time was the challenge.  So you know what I did?  I prepped everything for this in the afternoon before I picked the kiddos up from school.  I chopped the onion and garlic, uncased the chicken sausage, cleaned and cut up the escarole, made the chicken broth, and rinsed the beans.  This way all I had to do when I got home was to boil the water for the pasta.  Do you know that with all the prep work done I ended up having to wait for the pasta to finish cooking!!!  It came together in about 15 minutes.  Anyone can find time to make this one!
DSC_0255
Pasta with Escarole, White Beans and Chicken Sausage (adapted from The Food You Crave by Ellie Krieger)
Ingredients:
1 lb bowtie (or other shape) pasta
1 tbsp olive oil
½ medium red onion, chopped, about 1 cup
3 cloves garlic, minced
1 lb hot Italian-style chicken sausage, casings removed, crumbled
1 medium head escarole or endive, rinsed, drained and chopped, about 8 cups
1 14 oz can low-sodium great northern beans or other white beans, drained and rinsed
1½ cups low-sodium chicken broth
1 tsp rubbed sage, or 1 Tbsp fresh sage leaves
Salt
Freshly ground black pepper
1/8 cup grated Parmesan
Directions:
  • Cook the pasta according to the directions on the package.
  • Heat the oil over a medium heat in a large, deep saute pan or 8-quart stockpot.
  • Saute the onion until soft and translucent, about 5 minutes. Add the garlic and cook an additional 1 minute. Stir in the sausage and cook until heated through and browned, about 4 minutes.
  • Add the escarole and cook until wilted, about 3 to 4 minutes.
  • Add the beans, 1 cup of chicken stock, sage and simmer until the mixture is heated through and liquid is slightly reduced.
  • Add the sausage-bean mixture to pasta and toss well, loosening with the additional ½ cup chicken stock if necessary.
  • Season with freshly ground pepper and salt, to taste.
  • Divide among 4 pasta bowls and top with parmesan cheese.
***This one was a hit with the whole family.  Youngest even took it to school for her lunch in a thermos…
signature

Friday, September 24, 2010

Chicken Wings for #GoJunkFood

I was hanging out on twitter a couple of weeks ago and I saw some talk about chicken wings.  Love me some good ole chicken wings.  Remember when you were much, much younger and could go to the bars for 10 cent (where the heck is the “cent” key???) wing night?  Well I do and still to this day that’s how I like my wings.  Fried nice and crispy, smothered in a nice hot sauce that isn’t too thick or too thin but just right…and oh yah, for 10 cents a piece…LOL!!!

Well those days are long gone.  I think I have seen them advertised for 35 cents on special nights but to me that just isn’t the same.  We do have one wing place where the wings are good, especially if you order them well done!  But mostly wings out are a treat and when we do have a craving for them I make them really quick in the oven…watching the waist line you know and then I can have the sauce or the spices (depending on the mood) just right for me…

DSC_0252

Chicken Wings

Preheat oven to 400 degrees

Wash wings and remove any feathers that have been left on.
You can cut of the tips and separate them but my family actually fights over the tips (go figure???) so we leave them on. 
Place in a large bowl and toss with about half of the spice/seasoning rub and arrange on a foil lined pan for baking.
Bake for about 40 minutes or until cooked through and golden brown.

DSC_0258

Spice/Seasoning Rub for Chicken Wings

1 Tbsp granulated garlic
1/2 tsp onion powder
1/2 tsp black pepper
1-1/2 tsp kosher salt
1/2 tsp smoked paprika
1/4 tsp cayenne
1/2 tsp paprika

DSC_0250-1

Hot Sauce for Chicken Wings

1/2 bottle of Frank’s Red Hot Original
1 tsp granulated garlic
1 Tbs melted butter

Half of the wings I tossed with the Hot Sauce and the other half I tossed with the remaining Spice/Seasoning Rub.

These wings are part of the #GoJunkFood quest to take your every day bar food and put your own spin on it. Be sure to visit all of the other bloggers involved…

Elle at Elle’s New England kitchen
Paula at The Dragons Kitchen
Chris at Blog Well Done
Renee at Flamingo Musings
Heather at He Cooks...She Cooks

signature

Monday, April 12, 2010

In a hurry? Homemade Baked Chicken Fingers

P1020089-1

So you all know by now that we are a pretty busy household right?  Between ice skating lessons, karate classes and BMX races and practices you must wonder how we do all of that stuff and still eat home cooked, real food meals, right? 

This recipe for baked chicken fingers is one of my favorite go to recipes for a busy weeknight.  From start to finish it takes just 15 minutes for me to bread them and bake them and have them on the table for the kids.  Almost as fast as going to McDonald’s and getting the chicken nuggets and bringing them home for dinner…

Baked Chicken Fingers

Ingredients:

  • 1 lb boneless skinless chicken breast halves
  • 1 egg, beaten
  • 1 cup AP Flour
  • 1 teaspoon garlic powder
  • 1/4 teaspoon kosher salt
  • 1/4 teaspoon black pepper
  • 2 cups Italian breadcrumbs

Directions:

  • Preheat oven to 400F
  • Cut chicken breasts into thin strips, about one inch wide.
  • Longer sections can be cut in half to have uniform pieces.
  • Mix flour and seasonings (garlic, salt, and pepper) well in a bowl.
  • Dip chicken pieces into flour mixture. then egg mixture, and then finally in the Italian breadcrumbs.
  • Place on baking sheet sprayed with cooking spray. 6
  • Bake at for 9-11 minutes, until crispy on outside and lightly browned.

***The girls like these dipped in Ranch Dressing, ketchup, BBQ Sauce or even Honey Mustard.

****To have these ready in 15 minutes I have to cut the chicken into thin strips earlier in the day.  Another time saver is to bread them and refrigerate them until ready to use and then just plop them in a preheated oven.  See you can eat well even when as busy as we are!!!

signature

Sunday, September 20, 2009

Salsa Chicken Enchiladas

Quite possibly this is to be one of the laziest posts I’ve even written.  Why?  Because it is my lazy end of the week go to meal.  I got the recipe from my friend Lynn and have been making them regularly since!!!  This is a great recipe to use to feed a crowd and Lynn has used it to feed many over the years…

P1010886

Salsa Chicken

Ingredients:

I jar of good quality salsa (or just you favorite!)
chicken (4 breast or 8 thighs-boneless skinless)

Directions:

Throw chicken and salsa into a crockpot on low and cook for 4-8 hrs depending on whether or not you had the foresight to thaw your chicken (yes, I throw frozen chicken in here).

Once the chicken is done.  You need to remove it from the crockpot and the sauce and shred it.  This chicken can now be used in tacos, nachos, or anything else that requires some nicely seasoned chicken!

We use it in enchiladas…

 P1010882

Salsa Chicken Enchiladas

Ingredients:

corn tortillas
salsa chicken (see recipe above)
shredded cheese
onions, finely diced
enchilada sauce
jalapenos, finely diced

Directions:

Heat oven to 350F.

Using Elise from Simply Recipe’s process of heating the tortillas - “Heat a small light skillet on med-high heat. Add a teaspoon of oil (high smoke point oil as indicated above, we use grapeseed oil) to coat the pan. Dip a tortilla in the sauce (I used the sauce from the crockpot that I cooked the chicken in) to coat the tortilla with sauce on both sides. Place the tortilla in the skillet and heat for a few seconds, until the tortilla begin to show some air bubbles. Use a metal spatula to flip to the other side for a few more seconds. Set aside on a plate. Repeat with remaining tortillas.”

Using these tortillas place some shredded cheese, onion and shredded chicken in them and roll.  Place seam side down in a baking pan large enough to hold the amount you are making.  When the pan is filled top with enchilada sauce, onions, cheese and jalapenos.

Pop these in the oven and bake for about 20 minutes or until nicely browned and the cheese is all bubbly.

As Always…

Happy Entertaining!!!

Judy
www.nofearentertaining.com

Wednesday, April 1, 2009

Asian Inspired Chicken Salad

You know those meals or snacks that you make all the time but never really even think about writing about because to you they seem so normal? This recipe is one of them.

The other day I checked in with my tweeps on Twitter (follow me here) and mentioned that I had just had an Asian Chicken Wrap for lunch, thinking nothing at all of it other than it was really good and I used up the leftover chicken, when I got about 5 replies asking me to post it. I thought about it and still had some left so I was able to get some pictures of it.

Now this is not really a recipe but a list of ingredients because it really all depends on how much chicken you have on hand or if you decide to cook chicken special to make this.

Chicken (cooked, remember-leftover dish), diced
onion, diced fine
water chestnuts, drained and diced
mayonnaise
sesame oil
Coleman’s Dry Mustard
Salt and Pepper
White Pepper
Granulated Garlic

Mix the dry mustard with the sesame oil and then mix into the mayo. Makes for a much smoother mix.

We serve this in sandwiches or just as a salad, sometimes we use wraps or pitas. This time all I had was a tortilla shell and it worked great!!!

Hope you like it!!!

As Always…

Happy Entertaining!!!

Judy
www.nofearentertaining.com

Thursday, March 5, 2009

My new favorite way to cook whole chicken legs!

A couple of weeks ago I spatchcocked my first chicken. Since then I have definitely revisited the procedure. I also found that I love the method of cooking that I have been using and thought I needed to try it out on some chicken legs. I have been getting whole legs (thighs and drums attached) for $1.65 a lb at, get this, Whole Foods!!!

I ended up using the exact same method using my cast iron skillet as I did for the spatchcocked chicken. Clementine’s, fresh ginger, head of garlic all thrown into the cast iron skillet in the oven. To read more about the method I use read it here. If you have a cast iron skillet and want to try something different. Please give this a try.

We served it with some roasted herbed potatoes and a salad. I swear to you that I had dinner on the table within 45 minutes of getting home!

As Always…

Happy Entertaining!!!

Judy

www.nofearentertaining.com

Tuesday, February 17, 2009

So I spatchcocked a chicken...

Doesn't that look incredible???

And I have to tell you it is my new favorite way to prep chicken for cooking!!! The chicken is given a chance to cook more evenly and much faster than if you were to leave it whole.

Spatchcocking is simply the process of cutting out the backbone and the sternum and pressing your chicken flat. It has always intrigued me but I was a little intimidated to do it myself. When I was over at Jaden's house (Steamy Kitchen) the last dish that we started on was a spatchcocked chicken (seasoned with curry) that was browned up stove top in a cast iron skillet and then placed in the oven to finish cooking. She had added a split head of garlic and several halved clementines. She used the clementines and garlic to slightly raise the chicken from the bottom and then let it cook away in the oven. I had to leave but before the chicken was done but I couldn't stop thinking about it...

So here's what I did:

Took a small chicken and spatchcocked it, quite nicely too, and flattened it out. I seasoned it with some mixed seasoning, slat and pepper. Heated up my cast iron skillet (layer of oil on the bottom) on the stove top. Preheated the oven to 350 degrees.

Browned the chicken skin side up first then flipped it over. Squeezed a couple of clementines over the chicken and added them to the pot and stuffed them underneath the chicken along with some garlic and slices of ginger. I also threw in 2 Kafir lime leaves (Jaden had give me from her tree).

After about 35 minutes my chicken was done...I swear! This is the fastest and simplest way to cook chicken yet!!!

As Always...

happy Entertaining!!!

Judy

Monday, January 5, 2009

Coq au Vin

Served over rice this was a hearty and delicious meal that can be made ahead!!!

Can I really even call it that? I had to use red wine and I couldn't even be as clever as the RecipeGirl and call it Coq au Zin as she used zinfandel. I just had a bad bottle of red that I used! But it was good. This dish was really, really good. Who cares what it's called right?

I based it on a couple of different recipes that I found and I really liked how it turned out.

Coq au Vin-my way (inspired by here, here and here)

Ingredients:

6 leg quarters
2 Tbs olive oil
salt, pepper and garlic powder to season chicken
1/2 tsp dried thyme
10 cloves of garlic, cleaned and left whole
3 ribs of celery, chopped
1 large onion, rough chopped
1 cup crimini mushrooms, sliced or quartered
1 cup red wine
1 cup chicken stock

Directions:

Season chicken with salt, pepper, and garlic powder. Heat oil in a large dutch oven or pan. When the oil is hot add the chicken skin side down and brown well (you may have to do this in batches). Only brown the skin side. Remove from pan and set aside.

Remove all of the oil but for 2 Tbs and add the garlic, onion, celery. thyme and mushrooms. Cook until soft and the onions are starting to brown.

Add the red wine and reduce to about 1/2. Once reduced add chicken stock and bring to a boil. Return the chicken to the pot, skin side up and simmer until it is cooked through.

This turned out to be a really good meal served with rice and the sauce as an au jus. I was able to make this in the afternoon and refrigerate it, in the same pot, while we went to karate and then just heat it back up on the stove for dinner. Love a meal like this. So did the family!!!

As Always...

Happy Entertaining!!!

Judy
www.nofearentertaining.com

Thursday, October 2, 2008

Lemon Chicken Scaloppini...


I had no idea what was going to be for dinner last night. Wednesday night's are the only night that we aren't running off to something that the girls are doing so I usually put a bit more effort into the meal. This time it was easy though.

I went on Tastespotting for some inspiration and actually found something that wouldn't require me to re mortgage the house to make or take up any of my valuable "play with the kids time". Very, very important to me right now!!!

I came across this post for Lemon Chicken Scaloppini and just couldn't resist! I am so glad I didn't. I made this and served it with rice and green beans and it was incredible. The rice took longer to make then the chicken. Loved this dish...have I mentioned that I loved this dish????

Lemon Chicken Scaloppini (The Food Channel)

Ingredients

  • 3 boneless, skinless chicken breasts (I used 4 chicken cutlets. All natural, hormone and antibiotic free)
  • 1 cup flour
  • 1 tablespoon salt (I added garlic powder and black pepper as well)
  • 1/2 cup butter
  • 1/4 cup olive oil
  • 1/4 cup white wine
  • 1 cup chicken broth
  • 2 tablespoons capers, drained
  • 1 lemon, sliced very thin
  • Salt and pepper to taste (I also finished with garlic powder and onion powder)
  • 1/2 cup parsley, finely chopped

Preparation

  • Place chicken breasts on cutting board and slice in half horizontally, forming 8 thin filets.
  • Place each chicken fillet between two pieces of plastic wrap and pound until 1/4-inch thin.
  • Combine flour and salt in shallow container. Dredge pounded chicken in seasoned flour; shake off excess flour.
  • Heat butter and oil in large skillet. Working in several small batches, sauté chicken for 5 minutes over medium heat, turning once.
  • Add white wine and chicken broth. Simmer until the liquid is reduced by half.
  • Add lemon pieces and capers.
  • Season to taste; garnish with parsley.
Everyone loved this dish. Even my daughter who said "that smells so bad" ended up eating it and loving it!

As Always...

Happy Entertaining!!!

Judy
www.nofearentertaining.com

Thursday, September 4, 2008

Marmalade Curry Chicken???

I have been told to never make this again...it doesn't look that bad does it?

Does it really sound that bad? You should have seen T's face when I told him what we were having for dinner. Funny thing is I don't really like curry or Indian food (see this post) but I thought that it sounded pretty good (and would be using up several things in my fridge that I needed out...see the plan here?), and it would be using my Crockpot which I sort of have a love/hate relationship going with!

I was at the girl's school this morning for the first time as a volunteer so that was kind of fun and I had a brief meeting with the "gifted" coordinator to find out how far along we had gotten with my oldest daughter's paperwork. So I needed something quick and that didn't require too much attention from me. This is where the Crockpot comes in to play. I guess the reason that I don't like it all that much is that most of the things that I come across to cook in it have Cream of Mushroom Soup in it????!!! Are the 2 things made by the same company? Is Rival somehow linked to Campbell's? Whatever.

Anyway I came across this when I was looking for something to do with the marmalade and chicken. This recipe, although it is for in your Crockpot, has no cream soup of anything in it so I decided to give it a whirl!

Before the recipe though I want you to check out Stephanie's Blog. Stephanie likes me. I mean really likes me and even blogged about it. Pretty cool huh?

Marmalade Curry Chicken (adapted from Allrecipes.)

Ingredients:

  • 8 boneless, skinless, chicken cutlets
  • 1 Cup flour
  • 1 tsp garlic powder
  • pinch of cayenne pepper
  • 1/8 tsp white pepper
  • 1/2 tsp black pepper
  • 1 tsp salt
  • 1 (12 ounce) jar orange marmalade
  • 1/2 cup chicken stock
  • 1 1/2 tsp curry powder
  • 1/4 tsp ground cayenne pepper
  • 1/4 tsp ground ginger

Directions:

  1. Mix the flour with the next 5 ingredients. Dredge the chicken through the flour and place the chicken in the slow cooker. Whisk together the marmalade, chicken stock, curry powder, cayenne pepper, and ground ginger in a bowl. Pour over chicken breasts.
  2. Cover, and cook on High for 3 to 4 hours, or on Low for 5 to 7 hours. Make sure to flip over the chicken breasts once during cooking.
This meal didn't turn out so well and although it was really simple for me to throw in and not worry at all about for the day, T. has made me promise to not ever make it again! I didn't think it was all that bad but then again I got hit with a monster of a cold this afternoon and can no longer smell or taste anything. I guess that's a good thing from what the kids and T. said!!!

What it used up in from my fridge and freezer:

frozen chicken cutlets
jar of reduced sugar marmalade that tasted like crap
some left over chicken stock from another recipe last week


As Always...

Happy Entertaining!!!

Judy
www.nofearentertaining.com

Tuesday, August 5, 2008

A nice fast marinated chicken recipe!

Juicy skinless chicken thighs fresh off the grill!

Even during the summer my days are so hectic with the girls. I try to slow them down a bit but they love to be active. Today they ice skated for a couple of hour, we took a bike ride, and then my oldest one had karate before dinner time! Yep, everyday pretty much goes like this!

I need to work fast. I had about an hour before I had to take her to karate after getting home from the ice rink. In that time I made T. some homemade blue cheese dressing, whipped up a salad, emptied the dishwasher and refilled it, made a really quick marinade for some chicken thighs that I had bought and ran out the door...any crazy person want to follow me around for a day???

This marinade was so nice and quick and I think I will use it again and again!!!

Chicken Marinade


Ingredients:

1/2 cup Tropicana Pure Valencia Orange with Mango
1/2 cup fresh lemon juice (juice of 2 lemons)
4 lg sage leaves, chopped
1-1/2 inch section of fresh ginger, peeled and minced
1 Tbsp soy sauce
4-5 cloves of garlic, minced
1/8 tsp red pepper flakes

Directions:
  • Combine all of the above ingredients in a blender or a food processor. Blend until emulsified.
  • Marinate your chicken pieces for several hours or overnight.
  • Grill or broil your chicken til done.
As Always...

Happy Entertaining!!!

Judy
www.nofearentertaining.com

Thursday, June 12, 2008

Vine leaves stuffed with chicken and herbed goat cheese!


Yesterday was the first day since the girls finished school for the year that we didn't have a thousand things to do and I was actually able to make a meal for us. That is not to say that I still didn't face several challenges while doing this...dogs needing to go out, kids fighting in the pool, lawn guy asking me stupid questions, phone calls and the list goes on and on!!!

I had seen this recipe a week or so ago on Val's blog - More Than Burnt Toast and I knew that I could alter it to suit my tomato hater!

Here is Val's recipe as written. I have put my changes in italics in bold.

**Barbequed Chicken with Vine Leaves & Goat Cheese**

4 chicken legs or boneless, skinless breasts, without the bones (I used thighs)
200 g goat cheese
1 T freshly squeezed lemon juice
1- 2 tsp lemon zest
1 T snipped chives (I had no chives)
1 tsp finely chopped sun dried tomatoes (I used fresh chopped basil as we have a tomato hater)
20 vine leaves (canned in brine)
400 g tomatoes concassees (chopped or crushed)- concassees is seedless, skinless chopped tomatoes (see below for the sauce that I used)
¼ cup olive oil
salt & freshly ground black pepper
1 tsp sugar
oregano
aluminum foil

****************************
In a small bowl combine goat cheese. lemon juice, lemon zest, snipped chives and sun dried tomatoes.

Using a sharp knife, carefully slice the chicken fillets in half but not cutting all the way through to form a pocket for the goat cheese filling. Lay four or five vine leaves (depending on their size)overlapping on a piece of aluminum foil to create a large square and lay one of the chicken fillets on top of the leaves. Add the goat cheese filling divided into 4 equal portions inside the pocket of the chicken breast. Sprinkle with freshly ground pepper and proceed to wrap the grape leaves around the chicken breast like an envelope. Then tightly wrap the aluminum foil around the fillet, giving it a candy like shape like a tamale or if you are British like a Christmas cracker.

Repeat the process with the rest of the chicken fillets. If the vine leaves you are using are preserved in brine, avoid adding extra salt to the chicken. The salt from the brine will be more than adequate and it will taste better this way.

Preheat barbecue to 350 F. Place foil-wrapped chicken in barbecue. Cook for 15 minutes, flip chicken and cook for another 10. Let rest for 5 -10 minutes. Carefully remove foil by cutting foil twists off end and exposing grape leaf wrapped chicken.

Meanwhile: To prepare the sauce add the crushed tomatoes, olive oil, salt, pepper, sugar and oregano in a pot and allow it to cook for 20 minutes once it comes to a boil.

*****Because of my tomato hater I decided to make a lemon cream sauce to go on top:

Lemon Cream Sauce

zest of one orange
zest of one lemon
1 clove of garlic, minced
1 Tbsp flour
1 Tbsp olive oil
juice of one lemon
1/4 C heavy cream

Combine zest and garlic in a skillet. Heat until aromatic and the flour and oil and cook the flour until just browning and add the lemon. Finish it with the heavy cream.

This was an incredible meal that everyone liked. The grape leaves added a wonderful, briny flavor to the chicken. One of the best new things I have tried!!! Thanks Val!

As Always...

Happy Entertaining!!!

Judy
www.nofearentertaining.com

Saturday, June 7, 2008

Sunshine Citrus Chicken and Eggplant Fritters???

Eggplant Fritters with Sunshine Citrus Chicken!

Yesterday was the last day of school for this year. The girls were both super excited and so was I. I actually love the slower pace that we are able to enjoy in the ungodly hot months of June, July and August. We seem to be in our summer weather pattern already too (torrential rain and horrific thunderstorms every afternoon) which really inhibits what we can do later in the day. Of course we will still have the ice skating lesson 3 or 4 times a week and karate but at least it won't be so hectic. I also really am able to appreciate that I stay home with the girls. I love that we are able to spend a whole summer together getting to know one another!

Fresh Ginger - the skin hadn't even dried out yet!

Anyway for dinner last night I bought some boneless, skinless, chicken thighs (organic, free range, no antibiotics or hormones of course) and I marinated them in my Sunshine Citrus Marinade (I had some really old oranges and some really fresh ginger that I needed to use up).


Sunshine Citrus Chicken

Juice from half and orange
1 cup soy sauce (low-sodium if you like!)
1 tsp orange zest
fresh ground black pepper
1/2 tsp ground ginger
2 Tbsp Canola Oil
4 chicken thighs

Allow to marinate for at least 30 minutes (longer is better). Grill or bake until done!

Now the real surprise came when I decided to make a new side dish using an eggplant that I had bought last week! I got the recipe (sort of a recipe) from Jenn's blog The Leftover Queen. During the week of her wedding her Mother in Law came to stay with them from Italy. Jenn's post had these really great looking meatless meatballs made with eggplant! I just had to try them. Well I must have done something wrong because they looked nothing like her MIL's did!!! I think I should have drained my eggplant after I had roasted it and scraped out all of the seeds. I had to drop them by the spoonful to fry them. They were like a fritter by the time I was done with them. But we were all really pleasantly surprised by them!

This was the consistency that I got. I was afraid to add more bread crumbs (smother the taste of the eggplant) so this was as good as it was going to get!

Here's what I did:

I poked several holes in 1 large eggplant and roasted it at 400 degrees for about 40 minutes. Once it had cooled a bit I cut it open and removed the seeds and placed the remaining pulp in my food processor with a handful of dried parsley (I didn't have fresh), about a cup of seasoned bread crumbs and processed it all together. I kept adding bread crumbs until it was a consistency that I could drop from a spoon. Jenn's MIL were very dry looking (in a nice way) and mine sure weren't'!!! Fried up though in some hot oil they were wonderful!

Would I make these again? Oh yes definitely!!! They were delicious fried up like that!

As Always...

Happy Entertaining!!!

Judy
www.nofearentertaining.com

Thursday, May 22, 2008

Jamie Oliver's chicken thighs and a huge brag about my daughter!

My oldest daughter on TV during her schools morning news show!

First I want to start with my big Mommy moment. My oldest daughter is very bright. The reason that I moved her from private school to public school is that the public schools have more resources available to them to handle a child that is so bright. Yeah...I know we all think that our kids are brilliant but now I have some proof.

The school that they attend does an Accelerated Reading Program which basically means that the books they read have grade and point values attached to them. They are tested on comprehension for all of the books that they finish and are given a point value up to about 6 points (I think). The average amount of points is 3 or 4.

Well in the 4 weeks that my oldest daughter has been there she has accumulated a total of 62 points and has reach STAR Reader Certification after being certified in 5 other Reader groups. This is unprecedented at the school. Needless to say we are very proud of her. The school acknowledges major accomplishments like this on their school produced morning news program. Once again I forgot my camera and took this with my iPhone but you get the point!!!

Now for dinner last night. My sister had made one of Jamie Oliver's recipe and she was dying for me to try it. I made it last night and it was very good. I did make a couple of substitutions because I never have everything just right for a recipe unless I am baking. My changes are in italics beside the real thing. I also added garlic powder and fresh garlic for a bit more flavor.


Would I make this again?: It was delicious and I really loved it. During the week though I only have a limited amount of time to make dinner between homework X 2, cleaning up dog crap, answering incessant and inane questions, and just generally living so I think this used too many pots and steps for a week night meal. Great though for a Friday, Saturday or Sunday when things are not so hectic.


Crispy and sticky chicken thighs with squashed new potatoes and tomatoes by Jamie Oliver's Jamie at home "Cook your way to the good life"

1 3/4 lb new potatoes, scrubbed (white potatoes, I picked out the smallest ones in the bag)
sea salt & freshly ground black pepper and garlic powder
12 boned chicken thighs, skin on, preferably free-range or organic (I only had 7 skinless thighs)
olive oil
splash of red wine
1 1/4 lb cherry tomatoes, different shapes and colors if you can find them (frozen,skinned tomatoes quartered)
7 cloves of garlic, peeled and smashed
a bunch of fresh oregano, leaves picked (some fresh some dried)
extra virgin olive oil
red wine vinegar

  • Put the potatoes into a large saucepan of salted boiling water and boil until cooked.
  • While the potatoes are cooking, preheat your oven to 200C/400F/gas 6. Cut each chicken thigh into three strips and place in a bowl. Rub the meat all over with olive oil and sprinkle with salt, pepper and garlic powder, then toss. Heat a large frying pan, big enough to hold all the chicken pieces snugly in one layer, and put the chicken into the pan, skin side down. If you don't have a pan that's big enough, feel free to cook the chicken in two batches. Toss and fry over a high heat for 10 minutes or so, until almost cooked, then remove with a slotted spoon to an oven proof pan of dish. I deglazed the pan with red wine and poured it over the cooked chicken.
  • Prick the tomatoes with a sharp knife. Place them in a bowl cover with boiling water and leave for a minute of so. Drain and when cool enough to handle, pinch off their skins. You don't have to, but by doing this they will become lovely and sweet when cooked and their intense flavor will infuse the potatoes. By now the potatoes will be cooked. Drain them in a colander, then lightly crush them by pushing down on them with your thumb.
  • Bash up most of the oregano leaves with a pinch of salt in a pestle and mortar, or a flavor shaker if you have one. Add 4 tablespoons of extra virgin olive oil, a good splash of red wine vinegar and some pepper and give everything another bash. Add to the chicken with the potatoes, the tomatoes and the rest of the oregano leaves. Add the garlic cloves. Toss everything together carefully. Spread out in a single layer in an appropriately sized roasting tray, and bake for 40 minutes in the preheated oven until golden.

Lovely served with a rocket salad dressed with some lemon juice and extra virgin olive oil and a nice glass of white wine. We served it with a tossed salad and s a bottle of Pinot Grigio!This recipe came from Jamie at home "Cook your way to the good life"

This was my sister's version fresh from the oven!

As Always...

Happy Entertaining!!!

Judy
www.nofearentertaining.com

Saturday, January 26, 2008

It all started with a chicken...

Roasted Chicken

One day last week I thought it would be a great idea to roast a chicken. The weather was nice and cool and the kids always eat a roasted chicken real well. I was at the grocery store and bought a chicken. It was a 3 pounder but, get this, it cost me around $8???!!! Yes, it was organic, free range, no antibiotics or hormones, but still that is a lot for a small chicken. I figured though that I would be sure to make 2 meals out of it so could therefore justify the expense!

So have you ever made something and it turned out so delicious but you knew that because of all of the crazy components involved in the meal you would NEVER be able to recreate it? That's what happened here. First of all for dinner on Wednesday night I roasted the chicken. I roasted it my standard way...lost of garlic, butter to brown the skin, salt, pepper, poultry seasoning and half a lemon inside the cavity. I always roast this chicken in a large, heavy casserole dish because I love how moist the bird is when it is done. Anyway that with a salad was dinner on Wednesday. Chicken Stock Cooking

I saved all of the bones, drippings and the leftover meat and let them sit in the fridge over night. In the morning I took the bones out and threw them into a pot with the drippings, celery, onion, onion tops, parsley, and white pepper. I let this just barely simmer all day. Around dinner time I strained the stock and put the cleaned stock back on the stove and added the left over meat (cut into small pieces) and, now here is where it gets loopy, I had made stuffed eggplant during the week and had a bunch of leftover lentil stuffing so I tossed that into the pot as well. The smell of this soup cooking was out of this world. You had the lemony smell from the roasted chicken, cinnamon from the lentil mixture, and the wonderful savory smells from the stock that I made. To top it all off I made some dumplings to go in the pot. This soup was amazing but I will probably never be able or want to make it again. Next time it will be a bunch of different leftovers used in the pot!
Pot Full of Chicken Soup with Dumplings!

Dumpling Recipe

2 cups of all purpose flour
1 tsp salt
4 tsp baking powder
1 egg beaten
2 Tbsp melted butter
2/3 cups milk

Directions: Sift the dry ingredients together and the beaten egg, melted butter and milk. Stir gently until dry ingredients are just moist. Drop by teaspoon into the boiling soup pot and caver and cook for about 18 minutes. They should be nice, light and fluffy!
What a Great Bowl of Soup!

At least I can justify the $8 chicken now!!!

As Always...

Happy Entertaining!!!

Judy
www.nofearentertaining.com

Thursday, January 17, 2008

Sunshine Citrus Chicken


I guess a trend is starting to appear. We have been grilling a lot. There is a reason behind this. We all got a little fluffy (read fat) after the holidays and I find that the easiest way to get the extra weight back off is to eat lean, healthy meals. My method of cooking is not real lean so this is when we rely on the grill to help us out. Lucky for us we live in Florida so we can grill all year long and even if you live up north you can but it is definitely more challenging!

The kids have been getting a little tired of the regular old marinades and I happened to have an orange left from the muffins that I made yesterday (which she didn't like anyway!!!) so I knew it was going to be citrus based. Here is basically what I threw together. The measures are just estimates. Not so important for a marinade.

Sunshine Citrus Chicken

Juice from half and orange
1 cup soy sauce (low-sodium if you like!)
1 tsp orange zest
fresh ground black pepper
1/2 tsp ground ginger
2 Tbsp Canola Oil
4 chicken thighs

Allow to marinate for at least 30 minutes (longer is better). Grill or bake until done!

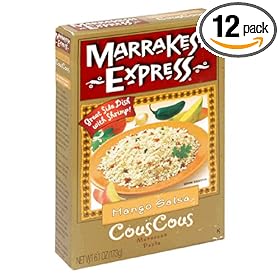
We served this with Marrakesh Express Mango Salsa Couscous which was surprisingly delicious. It was also a real treat because we let my oldest daughter (age 7) cook this herself. She sure was proud!

As Always...

Happy Entertaining!!!

Judy
www.nofearentertaining.com